For those of you interested - I have just started a new blog: I Danmark er jeg født (I was born in Denmark). I is written in Danish and I intend to communicate everyday happenings and thoughts.
Words and photos by Lene Rasmussen,Willows.
Tuesday, February 1, 2011

Thursday, January 20, 2011
Willow cuttings and dormant rods update
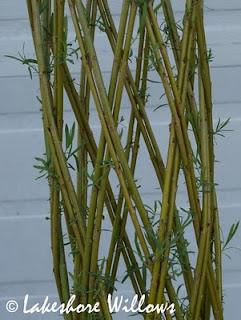
As the season for willow cuttings and dormant, living willow rods is approaching, I have just updated the "tabs" at the top of my blog with information about willow cuttings and living dormant rods (for Living Willow Fences (Fedge), huts, arbors, tunnels etc., and of course also for Living Willow Trees planted in pots or directly in the ground) for sale here at Lakeshore Willows, Wainfleet, Ontario, Canada.
For anyone interested in Living Willow workshops there is an overview of upcoming workshops etc. under the tab "events".
Words and photos by Lene Rasmussen,Willows.
For anyone interested in Living Willow workshops there is an overview of upcoming workshops etc. under the tab "events".
Words and photos by Lene Rasmussen,Willows.
Friday, December 31, 2010
Winter Planters with Willow
This year I chose to decorate my winter planters using willow as the main material.
 The planters at the back door each has 10 large branches of the curly willow, Salix x 'Red Corkscrew Willow' placed in the middle.
To complement the yellow and orange colours I made wreaths of Salix dasyclados and S. sachaliensis 'Sekka' and placed them on the edges of the planters.
 It was easy and I like the look - although I might have added a few, small green branches had the soil not been frozen by the time I started to work on the planters - I was lucky to get the willow rods in place before the soil was too hard.
The low, black planters at the front door are filled with branches of Salix x 'Flame', a few S. sachaliensis 'Sekka' (Japanese Fantail willow), and "sprigs" of evergreens.
As we do not have Christmas lights on the house, we decided to wrap two very large wreaths and three big stars - made with fresh rods of Salix dasyclados - with strands of clear mini lights and hung them at the front of the house over the holiday. It looked great and I will have to take photos to show next year.

Salix x acutifolia is interesting with a white bloom on the dark wine coloured stems and I used it as decoration on my advendt wreath this year - looking beautiful along with light purple ribbons. As I made a couple of Christmas decorations for the table, I also added a few stems for interest.
It is the last day of 2010 and I wish you all a Happy New Year with good health and lots of laughter.
Words and photos by Lene Rasmussen,Willows.
Monday, November 29, 2010
Salix x 'Flame' flaming in the November sun!

Sometimes you just have to post repeatedly about a subject - like the colours of the willow branches, intensifying after some frosty nights, and amplified by late afternoon sun.
The colours in the field looked so inviting from the house that I decided to walk out and try to capture some of it. Above is Salix x 'Flame' on November 11, 2010 burning in the late afternoon sun.

Salix x rubens 'Hutchinsons Yellow' - true to its name somewhat more yellowish - stunning.

Salix 'Americana' had taken on a beautiful brown colour with a touch of pink.

Time for harvesting has arrived - at least for some varieties.
Words and photos by Lene Rasmussen,Willows.
Friday, October 15, 2010
Weaving for the garden and the birds
At the willow weaving class in June I had a chance to meet a few of the members of the Southwestern Ontario Basketry Guild and it was a wonderful opportunity for me to get to know people with an interest in willow.
One of the girls, Janice joined my friend Frances and me for a couple of days of weaving here at Lakeshore Willows, where Janice and I benefited from Frances' great experience in willow weaving.
We used entirely left over willow from the above mentioned class in June - dried, then soaked willow kept in a freezer by Frances since June - and Frances was happy to see most of the willow finally transformed into something useful.
Both Janice and Frances have added wonderful posts to their blogs about our "Basket Camp" where you can read more about the experience.

This garter snake decided to pay us a visit in the garage. I was very surprised that he actually came right into the garage where we were working on the baskets - AND both dogs were there too. Maybe because it was a very hot day, but I quickly got him outside again - I really don't like snakes, even the harmless ones, and definitely not in the house. Really, since that day I catch myself checking for any movement whenever I step into the garage from the house!

Our finished garden baskets displayed on the deck.
Frances did a great job teaching us the techniques that were a great challenge for both Janice and me - especially to scallom and insert the stakes.

My basket in use - I just harvested the last big bunch of tomatoes a couple of days ago.

Our next project were bird-feeders. Here's Janice working on the base - Frances "lending a helping hand"

Our final products.
I think they look pretty good, considering they were our first attempts, helping each outer and following written instructions.
Words and photos by Lene Rasmussen,Willows.
Tuesday, August 31, 2010
Pruning to renew growth, shape
The Twisted Willow trees and the Harlequin trees that we made in the spring need a bit of maintenance to keep looking their best.
You want the plants to appear like a tree - with a trunk and a crown - but as the rods that we planted start to root and grow, they will naturally set shoots along the length of the rods. The shoots on the "trunks" of the trees have to be pinched off during spring and summer to keep the shape of the trees while the shoots in the top are allowed to grow. If you fail to do so, you will end up with a very bushy shrub in the pot.




You want the plants to appear like a tree - with a trunk and a crown - but as the rods that we planted start to root and grow, they will naturally set shoots along the length of the rods. The shoots on the "trunks" of the trees have to be pinched off during spring and summer to keep the shape of the trees while the shoots in the top are allowed to grow. If you fail to do so, you will end up with a very bushy shrub in the pot.


Keeping the twisted trees (from left: Salix x 'Flame, S. 'Americana', S. integra 'Hakuro Nishiki', and S. x acutifolia) free from shoots on the "trunk" is fairly easy as you basically just rub your hand down the trunk while the shoots are small. As you may see on the photos, the different varieties have different habits as to how many shoots they grow and how easily they are pinched off.
The Harlequin tree takes much more work and the variety in the picture, S. koriyanagi 'Rubykins' will have a lot of shoots in the spring and early summer with fewer shoots continuing to show up during the rest of the growing season and the following years.

In the photo to the left I have removed all the shoots and the trunks look clean and smooth.
When pinching off the shoots it is important to be careful not to damage the bark on the tree. If the shoot has been left too long you may rip some of the bark off if you "rub" or pull on the shoot - risking that that particular willow rod will die. If the shoots have been allowed to grow too big, it is a good idea to pinch them off with your finger tips or cut them off with a small pruning tool.
As the plants grow, you will also like to encourage the crowns to "fill in", get bigger and fuller. This is accomplished by pruning the crown a few times during the summer - starting when the individual shoots in the crown are about 25 cm long, cutting off about 10 cm.


On the left are the trees before pruning - I was late with the first pruning this summer - and on the right the same tree after it has been pruned.
The top tree is S. x acutifolia


The bottom tree is S. koriyanagi 'Rubykins'
They look a little "stunted" right after this operation, but the plants respond by developing two or more new shoots for each tip that has been cut off and after a few weeks you will have a larger, bushier crown.

This is what my very first Harlequin tree looks like now, planted in the garden.
Tuesday, July 6, 2010
Rib Style Basket Making
I was fortunate to attend four days of willow weaving classes last month - my first in Rib Style basket making (so for those who have followed my blog, yes it was my second willow weaving class ever) - and we were going to make four different baskets.


 My favourite basket was the "Willow Ridge Herb Basket", taught on the third day. For this basket I decided to try using "fresh, frozen, thawed" willow rods for weaving. I had (naturally, with my lack of experience) never tried that, but Jo uses fresh (or fresh, frozen) willow for most of her baskets and told me that for the rib style baskets it doesn't make much of a difference and you don't have to worry about drying and soaking the rods - you always have weavers ready to go. That is, of course, if you have lots of freezer room for willows. It definitely had another feel to it.

Words and photos by Lene Rasmussen,Willows.

The classes were taught by Jo Campbell Amsler of Willow Ridge Basketry who specializes in Rib Style baskets woven with willow and other natural weaving materials. Above is a selection of some of the beautiful baskets made by Jo which she brought to the classes. For information about Willow Ridge Basketry, the accomplishments of Jo, and upcoming classes, click on the link above.


On the first day we were taught a traditional "Gypsy Melon Basket" using some of the techniques the traveling Gypsies used when traveling from community to community selling their baskets. Most of us didn't quite finish our baskets during class and as we didn't want to go home with unfinished baskets, four of us (staying at the same inn) worked on finishing it in one of our rooms that night.

My "Gypsy Melon Basket" made with rods from Salix koriyanagi 'Rubykins' from my field. I have decided that this is going to be my "tool basket". Not too big, but big enough - and very cute.

My "Wisteria Bowl" made over a rim created by twisting wisteria wines into a circle (holding it in place till it has dried). I chose to make it rather shallow, almost tray-like. The weaving material is a combination of various willow weavers and thinner wisteria wines. It was fun to "feel" the nature of the different materials as I don't have any former experience weaving with natural materials.
 My favourite basket was the "Willow Ridge Herb Basket", taught on the third day. For this basket I decided to try using "fresh, frozen, thawed" willow rods for weaving. I had (naturally, with my lack of experience) never tried that, but Jo uses fresh (or fresh, frozen) willow for most of her baskets and told me that for the rib style baskets it doesn't make much of a difference and you don't have to worry about drying and soaking the rods - you always have weavers ready to go. That is, of course, if you have lots of freezer room for willows. It definitely had another feel to it.
Our last basket - the "Charm Basket" - was a smaller basket, thus much less room to work the weavers and because of that it was not - as I had expected - the easiest of the baskets to make. It is called "Charm Basket" as small charms are attached to the ends of the handle, dangling. I didn't attach any yet, but in the top collage - middle, right - you can see one of Jo's baskets with charms of tiny pieces of driftwood, willow beads, acorn "tops" etc.
Very few willow classes are offered in North America and none here in Ontario (not that I have been able to find) and am so happy that I found the Southwestern Ontario Basketry Guild who sponsored these classes with Jo Campbell Amsler. I hope that the interest in willow weaving will increase so that we will have an opportunity to attract other instructors to teach us their willow weaving techniques.
Words and photos by Lene Rasmussen,Willows.
Subscribe to:
Posts (Atom)


 Posts
Posts


