Showing posts with label Salix koriyanagi 'Rubykins'. Show all posts

Monday, September 10, 2012

Planting willow in your garden for colour?

It is not unusual to find articles in gardening magazines showing the very colourful stems of willow in the wintertime and most often the featured willows are varieties or hybrids of “white willow”, Salix alba.
Here are a few pointers that are often overlooked.
First of all it is ONLY the growth from the previous growing season that has colour. If you leave your willow shrub unpruned, you will end up with a large shrub with a few small, colourful tips during winter. Therefore – to really get a beautiful colour display you should coppice (cut down to the ground) the plants late winter/early spring as they will grow long shoots during one growing season and they will all have coloured bark. To make a real statement you could plant several plants of the same variety close together (about 30 cm/1foot apart). If you have a small garden and are worried that planting several willows will be too much for your other plants, you can repeat the coppicing (cutting down to the ground) in early summer. Supposedly (and I say that because I don’t have any personal experience/knowledge of this, but have read about it) the willow will not develop a large root if it has to use energy on new growth once or even twice annually.
In my opinion it is not only for winter colour that you plant willow in the garden. Many of the willows have very beautiful foliage, form and colour throughout the year. To illustrate this I have found a few photos:
I will start with Salix x ‘Flame’ as that one is often mentioned as a candidate for winter colour.100_3246By the time the leaves drop off, the bark has developed some colour that will intensify as the weather gets colder.
Flame June 2, 09 Salix x 'Flame', July 3, 2012 'Flame' July 3, 2012 3 
Salix x ‘Flame’ has beautifully coloured leaves in spring and early summer and the stem colours will vary from a light greenish/yellow/orange to a darker reddish brown. The two photos marked July 2012 are of the same plant, but photographed from the North and South sides of the plant. The more sun that the plant gets the darker the colour during the summer and these stems are darker on one side than on the other.
Another willow that has been planted in a lot of gardens during the last few years is the dabbled willow, Salix integra ‘Hakuro Nishiki’. A large shrub with pink shoots can look very beautiful, but as you can see on the following photo this willow can also be planted in your mixed bed, coppiced annually and it just looks lovely.
Salix integra 'Hakuro Nishiki'  Nishiki Oct 29, 09

The variegated leaves are beautiful and the tip of the branches continue to be of an almost coppery colour during the summer. After the leaves have dropped the stems on this willow is a paler reddish brown.
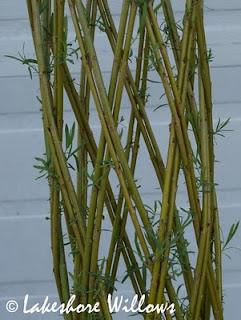
One of my favourite willows (I have quite a few) is Salix koriyanagi ‘Rubykins’. It grows tall and slender one year rods when coppiced at the end of winter.
Salix koriyanagi 'Rubykins' Rubykins single stem Sept. 1,09 Rubykins tip, Sept 7, 09 Rubykins, May 1, 2009
The very first leaves in spring are an incredible coral/peachy colour. Later the leaves are darker green, but the tips of the branches remain very colourful as you can see on the photo. Maybe that explains the name ‘Rubykins’? The last two photos show the light green colour of the stem. That is also the colour that the stems have during winter.


The last variety featured today is Salix x acutifolia
  Salix x 'Acutifolia' July 3, 2012 Harlequin acutifolia foliage Aug 5, 09 New shoot, acutifolia tree
100_3529
The winter colour of acutifolia is a very unusual and pretty dark purple that gets a bloom – a whitish waxy covering. If the plant is not coppiced the colour of the two year old branches will look almost as if they have been white washed. On the second photo you can see the red stems on the new growth and at the bottom of the photo you can see the two year old whitish stems (it is a braided Harlequin tree)

Wednesday, September 28, 2011

Transplanting your potted willow tree to your garden

As the summer is slowly fading, the colours change and the leaves start to fall, it is time to transplant your potted willow tree to the garden - if you haven't done so yet.


When you first made your tree at our workshop (or bought it) in the spring, the willow rods didn't have any roots yet and you had to leave it in the pot to root and start growing.
It would look like the one in the photo on the left.

When the roots have developed during the summer, you can transplant it to your garden - and by this time of the year you have to do so. First of all the roots may not make it through the winter in the pot above ground, and secondly the woven tree is really 32 willow plants in that little pot - so it really wants to get some more room for its feet.

This morning - still a bit of fog in the air - a woven tree waiting to be planted looks like this one in the photo to the right.
Words and photos by Lene Rasmussen,Willows.

Monday, November 29, 2010

Salix x 'Flame' flaming in the November sun!

Sometimes you just have to post repeatedly about a subject - like the colours of the willow branches, intensifying after some frosty nights, and amplified by late afternoon sun.
The colours in the field looked so inviting from the house that I decided to walk out and try to capture some of it. Above is Salix x 'Flame' on November 11, 2010 burning in the late afternoon sun.

Salix x rubens 'Hutchinsons Yellow' - true to its name somewhat more yellowish - stunning.

Salix 'Americana' had taken on a beautiful brown colour with a touch of pink.


Interesting enough Salix koriyanagi 'Rubykins' still had all green leaves, standing tall, slim, and beautiful, the rods a bright green with some rosy cheeks.

Time for harvesting has arrived - at least for some varieties.

Words and photos by Lene Rasmussen,Willows.

Tuesday, August 31, 2010

Pruning to renew growth, shape

The Twisted Willow trees and the Harlequin trees that we made in the spring need a bit of maintenance to keep looking their best.
You want the plants to appear like a tree - with a trunk and a crown - but as the rods that we planted start to root and grow, they will naturally set shoots along the length of the rods. The shoots on the "trunks" of the trees have to be pinched off during spring and  summer to keep the shape of the trees while the shoots in the top are allowed to grow. If you fail to do so, you will end up with a very bushy shrub in the pot.
Keeping the twisted trees (from left: Salix x 'Flame, S. 'Americana', S. integra 'Hakuro Nishiki', and S. x acutifolia) free from shoots on the "trunk" is fairly easy as you basically just rub your hand down the trunk while the shoots are small. As you may see on the photos, the different varieties have different habits as to how many shoots they grow and how easily they are pinched off.
The Harlequin tree takes much more work and the variety in the picture, S. koriyanagi 'Rubykins' will have a lot of shoots in the spring and early summer with fewer shoots continuing to show up during the rest of the growing season and the following years.


In the photo to the left I have removed all the shoots and the trunks look clean and smooth.
When pinching off the shoots it is important to be careful not to damage the bark on the tree. If the shoot has been left too long you may rip some of the bark off if you "rub" or pull on the shoot - risking that that particular willow rod will die. If the shoots have been allowed to grow too big, it is a good idea to pinch them off with your finger tips or cut them off with a small pruning tool.

As the plants grow, you will also like to encourage the crowns to "fill in", get bigger and fuller. This is accomplished by pruning the crown a few times during the summer - starting when the individual shoots in the crown are about 25 cm long, cutting off about 10 cm.

On the left are the trees before pruning - I was late with the first pruning this summer - and on the right the same tree after it has been pruned.
The top tree is S. x acutifolia


The bottom tree is S. koriyanagi 'Rubykins'

They look a little "stunted" right after this operation, but the plants respond by developing two or more new shoots for each tip that has been cut off and after a few weeks you will have a larger, bushier crown.

This is what my very first Harlequin tree looks like now, planted in the garden.


Tuesday, July 6, 2010

Rib Style Basket Making

I was fortunate to attend four days of willow weaving classes last month - my first in Rib Style basket making (so for those who have followed my blog, yes it was my second willow weaving class ever) - and we were going to make four different baskets.
The classes were taught by Jo Campbell Amsler of Willow Ridge Basketry who specializes in Rib Style baskets woven with willow and other natural weaving materials. Above is a selection of some of the beautiful baskets made by Jo which she brought to the classes. For information about Willow Ridge Basketry, the accomplishments of Jo, and upcoming classes, click on the link above.
On the first day we were taught a traditional "Gypsy Melon Basket" using some of the techniques the traveling Gypsies used when traveling from community to community selling their baskets. Most of us didn't quite finish our baskets during class and as we didn't want to go home with unfinished baskets, four of us (staying at the same inn) worked on finishing it in one of our rooms that night.

My "Gypsy Melon Basket" made with rods from Salix koriyanagi 'Rubykins' from my field. I have decided that this is going to be my "tool basket". Not too big, but big enough - and very cute.

My "Wisteria Bowl" made over a rim created by twisting wisteria wines into a circle (holding it in place till it has dried). I chose to make it rather shallow, almost tray-like. The weaving material is a combination of various willow weavers and thinner wisteria wines. It was fun to "feel" the nature of the different materials as I don't have any former experience weaving with natural materials.                                                                   
My favourite basket was the "Willow Ridge Herb Basket", taught on the third day. For this basket I decided to try using "fresh, frozen, thawed" willow rods for weaving. I had (naturally, with my lack of experience) never tried that, but Jo uses fresh (or fresh, frozen) willow for most of her baskets and told me that for the rib style baskets it doesn't make much of a difference and you don't have to worry about drying and soaking the rods - you always have weavers ready to go. That is, of course, if you have lots of freezer room for willows. It definitely had another feel to it.
Our last basket - the "Charm Basket" - was a smaller basket, thus much less room to work the weavers and because of that it was not - as I had expected - the easiest of the baskets to make. It is called "Charm Basket" as small charms are attached to the ends of the handle, dangling. I didn't attach any yet, but in the top collage - middle, right - you can see one of Jo's baskets with charms of tiny pieces of driftwood, willow beads, acorn "tops" etc.
Very few willow classes are offered in North America and none here in Ontario (not that I have been able to find) and am so happy that I found the Southwestern Ontario Basketry Guild who sponsored these classes with Jo Campbell Amsler. I hope that the interest in willow weaving will increase so that we will have an opportunity to attract other instructors to teach us their willow weaving techniques.


Words and photos by Lene Rasmussen,Willows.

Sunday, April 25, 2010

Workshop fun!

We had three workshops here in April and I believe that everyone - not just me - had great fun. I met some really wonderful fellow gardeners, people enthusiastic about doing something different and I have received a lot of positive feed-back.
My friend, garden writer, author Yvonne Cunnington posted about her woven willow creation on her blog. Garden writer, editor and Master Gardener, Lorraine Flanigan was spreading the word about Living Willows at a presentation at Bolton Horticultural Society. Claudette Sims, a  Halton Master Gardener would like to be able to show fellow master gardeners some willow workshops next spring. Judy and Caroline are arranging a group visit here later and I have several people expressing interest for next year's workshops already.
Salix integra 'Hakuro Nishiki' (Japanese Dappled Willow) was a popular choice of variety for the twisted tree.
'Hakuro Nishiki' is a beautiful willow at all stages. The photos show (from left to right) how the foliage changes during the summer. When the new leaves start to unfold, they are a tender cream and green (sometimes a pinkish white), but then, for about 4-6 weeks in June-July, the tips of the shoots are a stunning pink. We have even had hummingbirds hoovering at the plants, thinking that they were flowers to feast on. Later in the summer the leaves are green with big splashes of creamy white and some coppery tones on some of the tips of the branches.

Salix x acutifolia - shown on these photos - was also available for the twisted tree. The bright colours on willow stems are only showing on new, one year old branches. On most willow varieties the older branches turn various colours of green or brown, but this one is quite different. The photo on the left shows the dark burgundy colour on the rods just after harvest in the spring (so they are still one year old). Soon after the new growing season starts, a white bloom is covering the stems and they stay like that for the rest of the season to turn almost black come spring. The photo on the right is a close up of the plant in summer - the new shoots bright red while the older wood on "the trunk" is white.

Salix x 'Flame' was picked for a couple of twisted trees, and Salix koriyanagi 'Rubykins' - in this photo - and Salix 'Americana' were available for both the twisted tree and the harlequin tree.
Thank you all for participating, for the great feed-back, and for your enthusiasm for "Willows". Thank you Lorraine for allowing me to use some of your photos from the workshop.
Words and photos by Lene Rasmussen,Willows.

Tuesday, April 13, 2010

Willow harvest and the beginning of a new season

I finished harvesting a couple of weeks ago and I sorted the willow for different purposes.

The rods for drying for future weaving projects are sorted and bundled to be placed in the barn for drying over the next few months.

The large rods to be used for living willow projects - as the woven fence in the picture here and my various trees - were wrapped in black plastic and stored in the shade on the North side of the barn to prevent them from drying out and make sure they stay dormant. More to come soon about my workshops and the woven fence (also called a fedge).
Then, as I prepared for my workshops , I placed the bundles in buckets with their feet in water - still in the shade - Here are some of the Salix koriyanagi 'Rubykins', the rods up to 2.5 meters (8 feet) long, no branching and perfect for making the Harlequin tree.
As the majority of my willows were planted last spring, and most willow varieties don't grow the long, unbranched rods the first year, I had a big pile of branches that were not good for my above uses. I will play with it a bit to find use for some of it and maybe part of it will end up on a bonfire.
Spring is here and I am so pleased to see that the willow in the field is starting to show new growth. In a few weeks I will be posting photos from the field with beautiful colours. Even the very new and small shoots look quite different on the different varieties.          
The potted trees that i have at the front door started to leaf out a couple of weeks ago and by now they look like this. The wine red stems of Salix x acutifolia get a greyish-white bloom during their second year and after that they turn almost black. Very interesting and beautiful variety. It is great for living willow projects, but not very good for weaving as it is not very flexible.
Words and photos by Lene Rasmussen,Willows.